2018/10/12

今回はマイグレーション作成から実行まで行います。
データベースのテーブルを作成します。
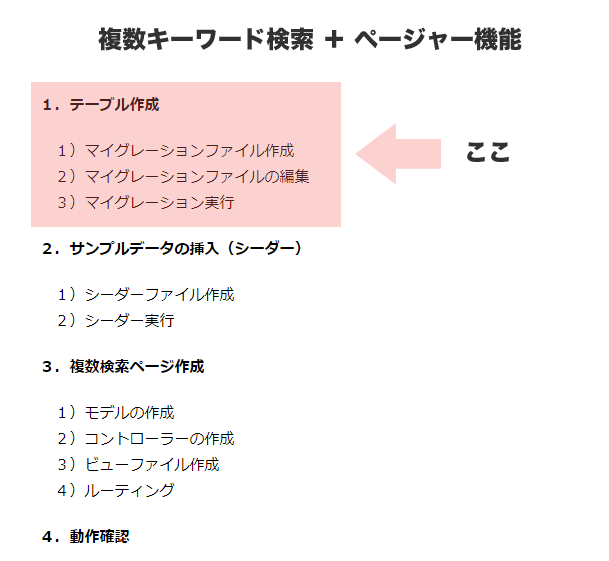
手順
1)マイグレーションファイルの作成
2)マイグレーションファイルの編集
3)マイグレーション実行
4)確認
1)マイグレーションファイルの作成
「部署」のマイグレーションファイルを作成
$ php artisan make:migration create_depts_table
「従業員」のマイグレーションファイルを作成
$ php artisan make:migration create_employees_table
2)マイグレーションファイルの編集
「従業員」テーブルのスキーマを構築。
public function up()
{
  Schema::create('depts', function (Blueprint $table) {
  $table->increments('id')->comment('部署ID');
  $table->string('dept_name')->comment('部署名');
  });
}
public function down()
{
  Schema::drop('depts');
}
「従業員」テーブルのスキーマを構築。
イントロで決めたテーブル構成に沿って構築していきます。
public function up()
{
  Schema::create('employees', function (Blueprint $table) {
  $table->increments('id')->comment('従業員ID');
  $table->integer('dept_id')->comment('部署ID');
  $table->string('name')->comment('名前');
  $table->string('address')->comment('住所');
  $table->string('email')->comment('メールアドレス');
  $table->integer('old')->comment('年齢');
  $table->string('tel')->comment('電話番号');
  });
}
public function down()
{
  Schema::drop('employees');
}
3)マイグレーション実行
$ php artisan migrate
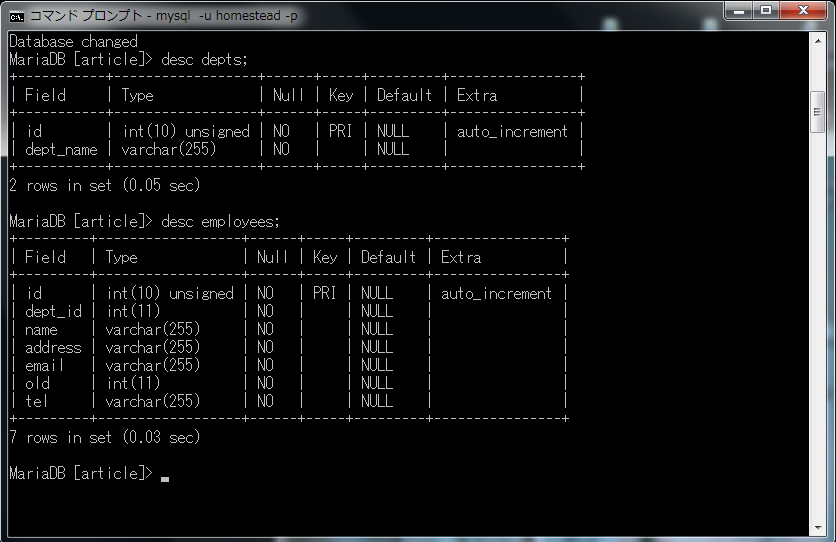
4) 確認
desc depts;
desc employees;
マイグレーションによるテーブルの作成は以上です。
次回は STEP2 の「サンプルデータの挿入(シーダー)」をやります。
仕事で Laravel を使っています。気づいたことや新しい発見など情報を発信していきます。問い合わせはこちら。